 + 1-888-827-0150
 + 44-20-3006-2750


Lesson 7: Creating Your Slide
In this lesson, we’ll be looking at how to make slides for your presentation.
Objectives:
- To identify how to create slides on Microsoft PowerPoint
- To demonstrate how to create and delete slides
- To demonstrate how to duplicate slides
Quick Navigation through the Lesson 7:
In this lesson, we begin working on our PowerPoint presentation. As we discussed in earlier section of this class, the basic unit of a PowerPoint presentation is the slide. We’ll be dedicating this part of our class to learning how to make slides, how to delete them and how to duplicate them. We’ll also be touching on the Undo and Redo functions and how you can make use of them when working on your slideshow.
Creating a Slide & Choosing a Template
This is the first step: you can create a slide by choosing the button on the Slides portion of the Home menu.
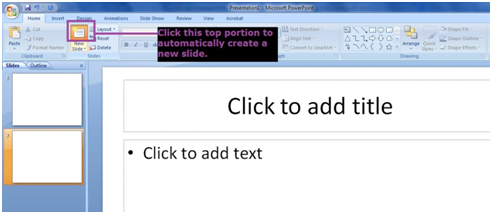
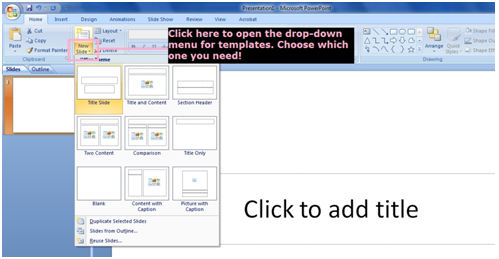
Click on the arrow below the “New Slide” button to choose what kind of template you want: template in this case refers to a fixed arrangement of words and text provided by the software which you can decide on based on what you need. You may also opt to create a blank slide which you can customize on your own.
Duplicating a Slide
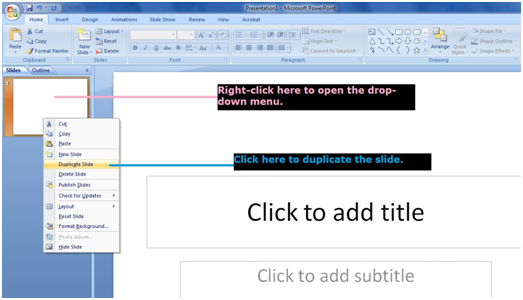
Duplicating a slide saves you the trouble of having to start from scratch. You’re also able to avoid the hassle of selecting everything on a slide and then copy/pasting it. You can do this by right-clicking on your slide in the Slides panel and then selecting Duplicate Slide from the drop-down menu which will appear.
Deleting a Slide
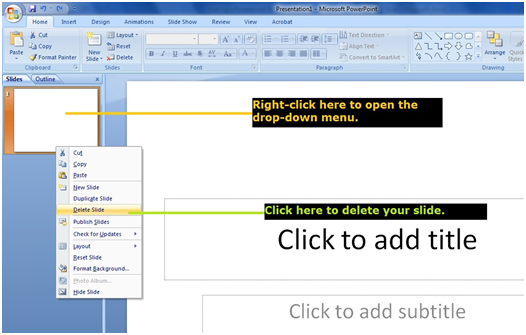
Deleting a slide is essential for trimming your presentation and making sure that your content is clear and concise. There are two ways which you can delete a slide: the first is to simply select the slide in your Slides panel and then press the Delete button on your keyboard. Or you can right-click on the slide in the Slides panel (like we did in the previous item) and select Delete Slide.
Undo/Redo Functions
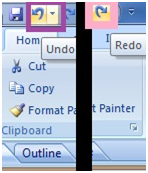 These two functions are fairly simple but will be extremely helpful in the long run. When making a PowerPoint presentation, especially when one is in a hurry, it is very easy to make mistakes. These two functions help you either undo or redo actions that you’ve recently applied to your slide. This will work even if you’ve saved the file already—although it only works for the duration of a session; once you’ve closed the file using these functions can’t undo or redo work you did before closing the file. There are two ways to access this: the first is pressing Ctrl + Z (Undo) or Ctrl + Y (Redo) and the second is through your Quick Access Toolbar which we took up in the previous lesson. This is located in the upper-right portion of your PowerPoint window.
In this lesson, we learned about the basics of making slides. We were able to learn how to make slides and alternately, how to delete them. We were also able to learn how to copy our slides to save more time and how to undo or redo our actions quickly. These skills will help us when we proceed to the more complex aspects of making PowerPoint presentations.
Try Our Exercise And and Prep Yourself for the Real Thing
Next we’ll be discussing how to design your slides. This part of our lesson will be the most fun because we’ll be exploring how to change the background of your slides, and how to manipulate pictures and text. This will give your slideshow coherence and increase the impact your presentation has on your audience.

