 + 1-888-827-0150
 + 44-20-3006-2750


Exercise Lesson 6: Views
Instructions
Below are a few exercises to help you practice. Follow instructions carefully. A sample slide is shown to help you understand how your final outcome should look.
- To your current presentation, add two more slides after the one you just worked on.
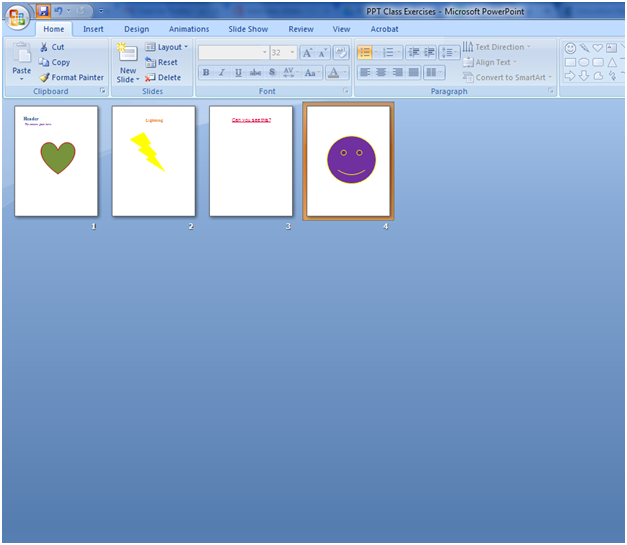
- On the third slide, add a textbox.
- In this textbox, it should read “Can you see this?”—make it in Arial, size 30, underlined.
- Change the textbox fill to black.
- Change the text fill to pink.
- On the fourth slide, add a smiley face shape.
- Change the color fill to purple and the outline color to yellow.
- Using the Slide Sorter view, preview how your slides look.
- Use the Quick Access Toolbar to save your work.
Upon completion of the 9th step, your presentation should look like this:
In this exercise, we were able to practice most of the skills we learned in the previous lessons. We were also able to utilize the different kinds of views. We saw how the Slide Sorter view in particular can be used to track the progress of our slides so far.
